
Author: rgsind
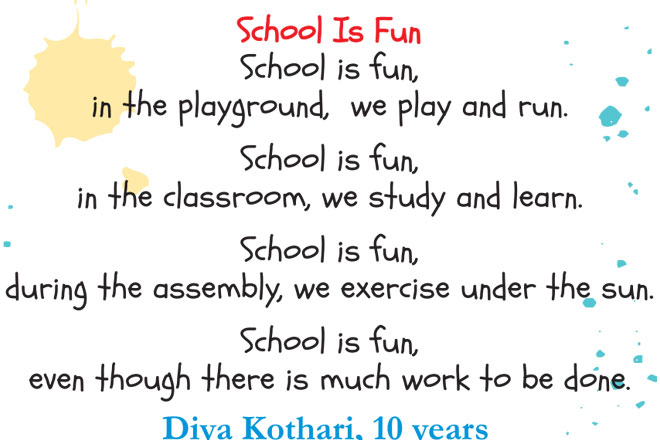
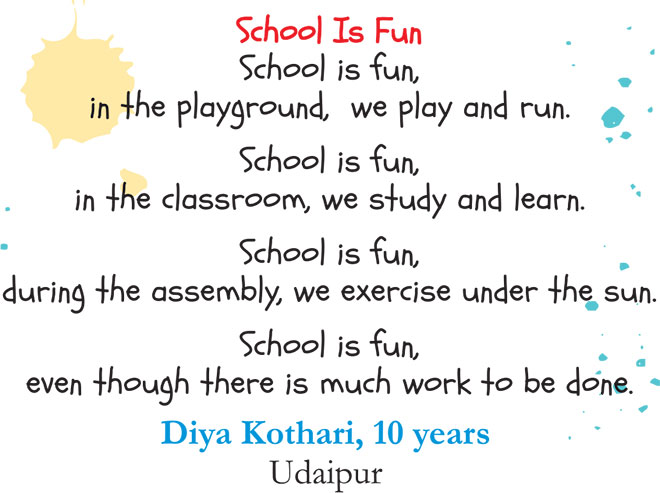
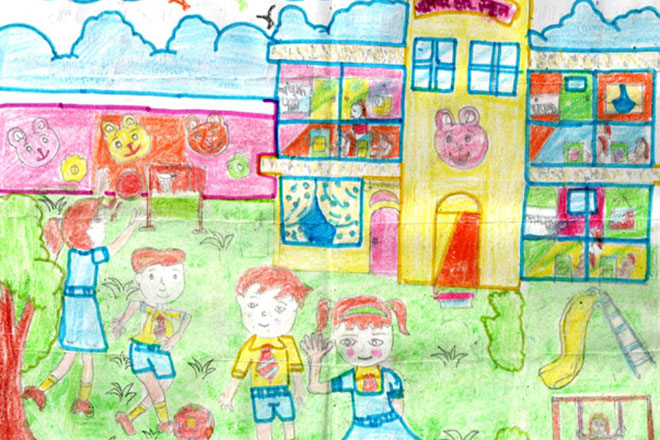
School Is Fun
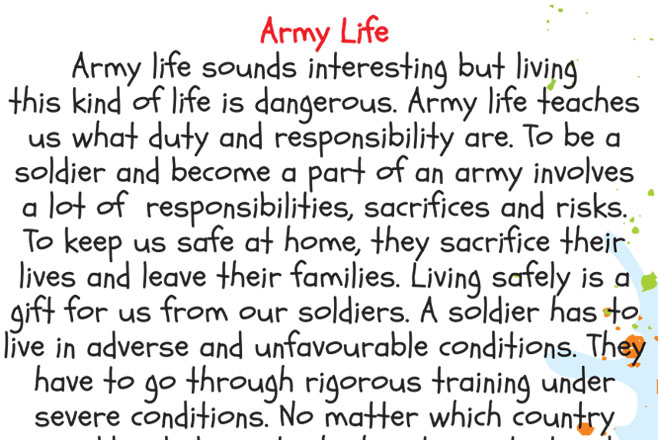
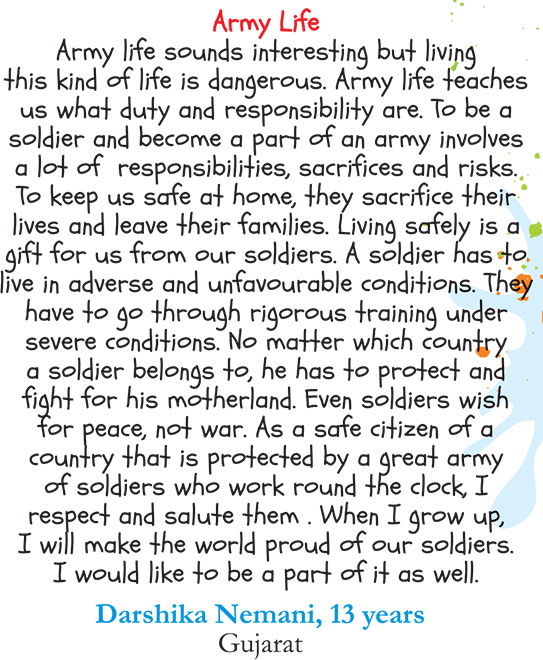
Army Life

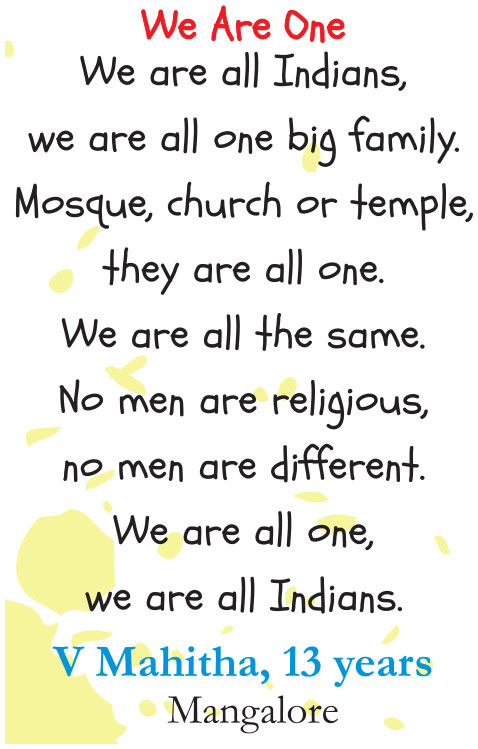
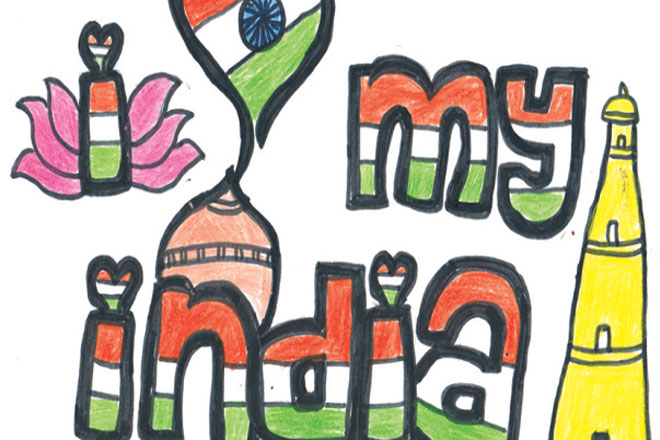
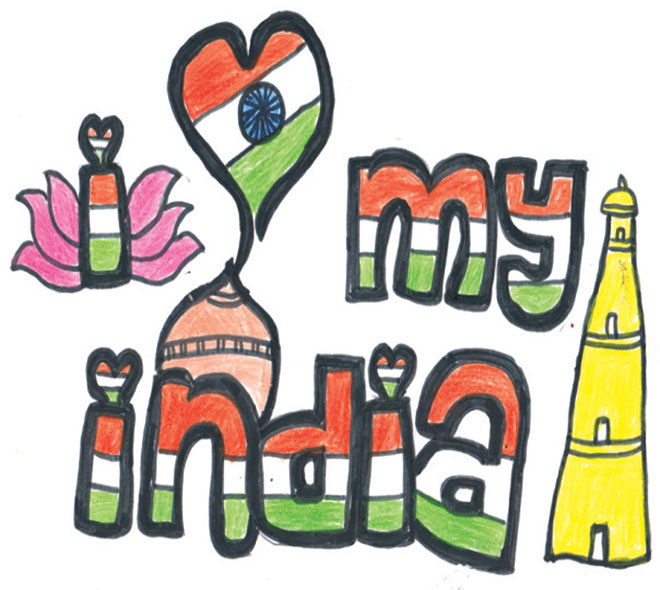
We Are One
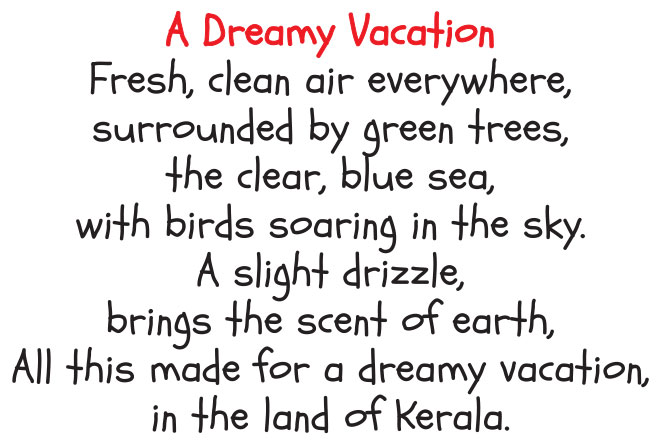
A Dreamy Vacation

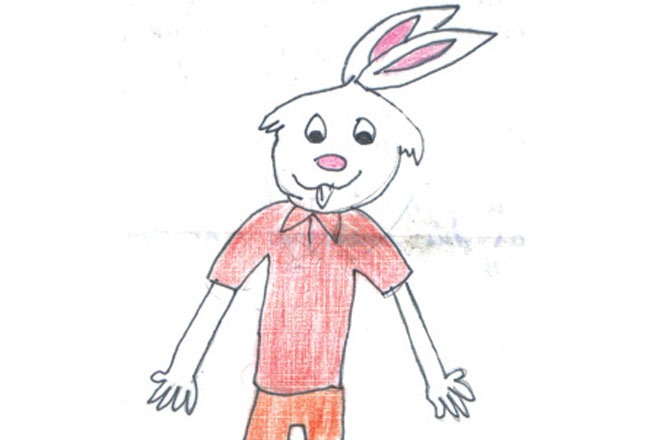
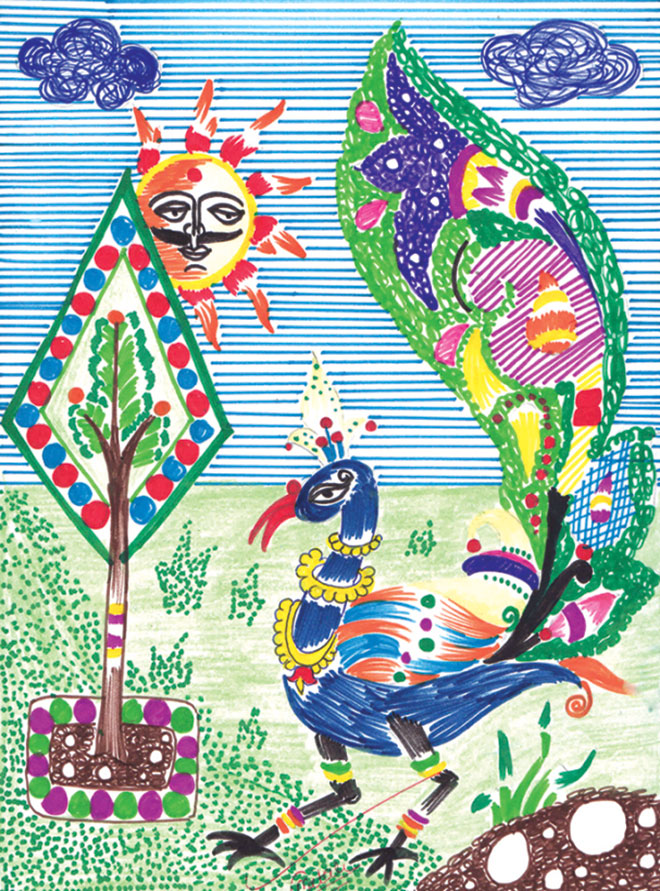
Varad Krishna Deshmukh
Here is the bookmark our reader Varad Krishna Deshmukh, 12 years, from Parbhani has made using SMART!
Hansika Tripathy
Ankita Dilip Ghorai

Janvi
Karan Kumar
Khushi A. Patel

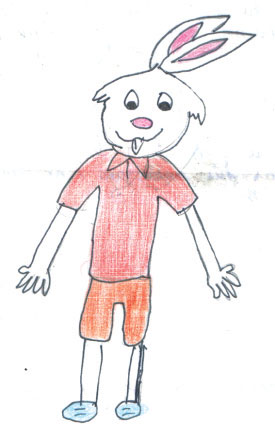
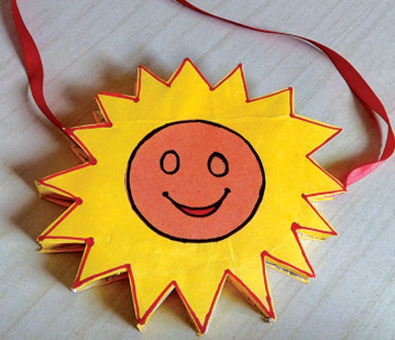
Sun Bag
Here is the sun bag our reader Aarya Shewale, 12 years from Malegaon has mae using SMART
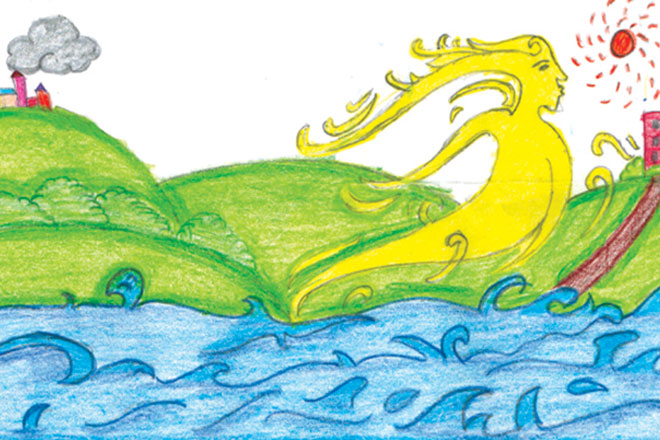
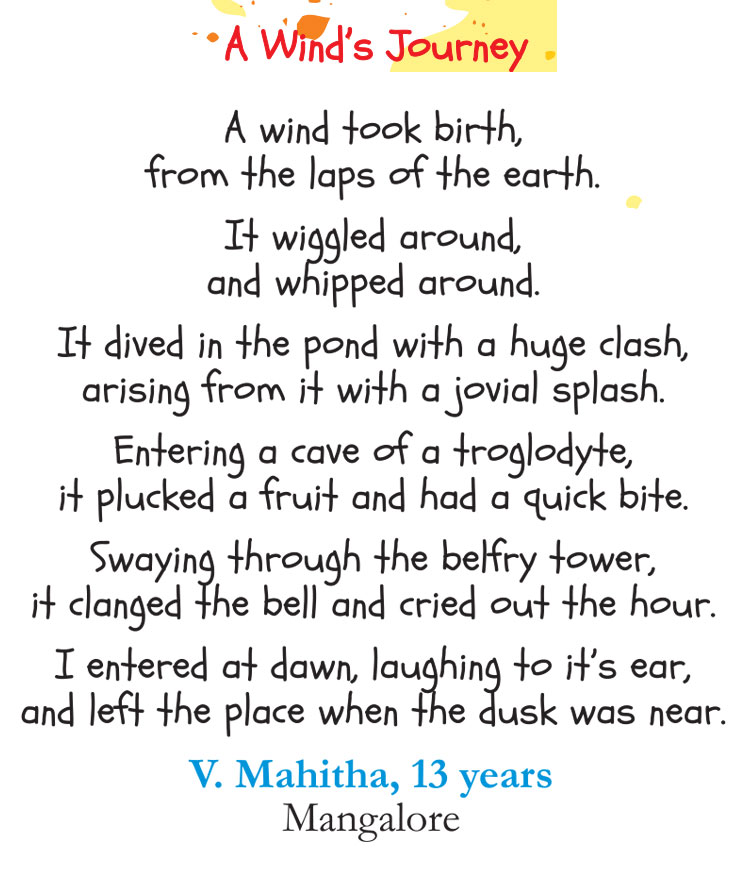
A Wind’s Journey
A Wind’s Journey
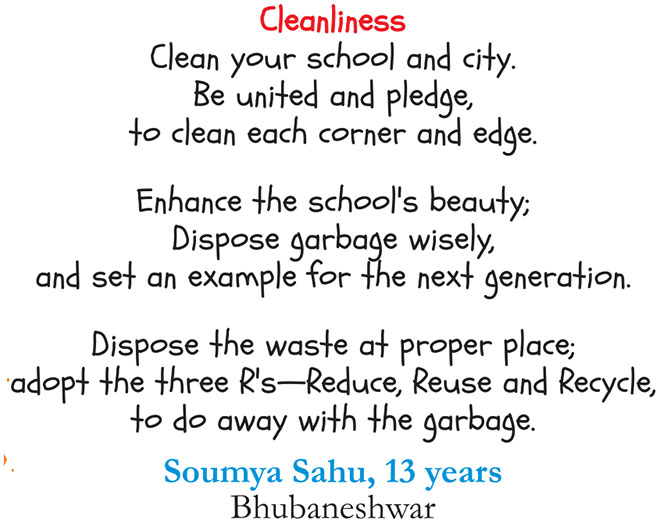
Cleanliness
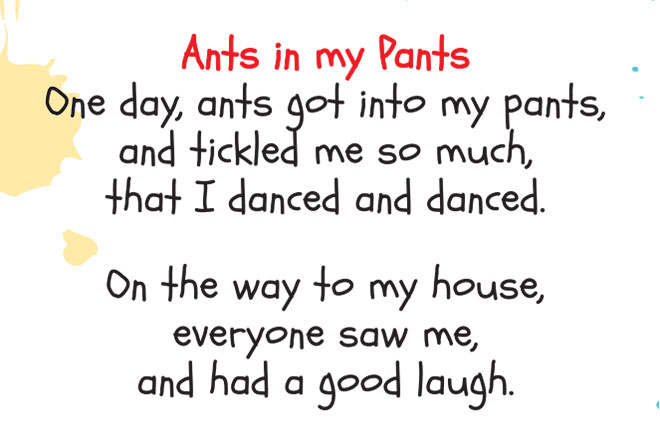
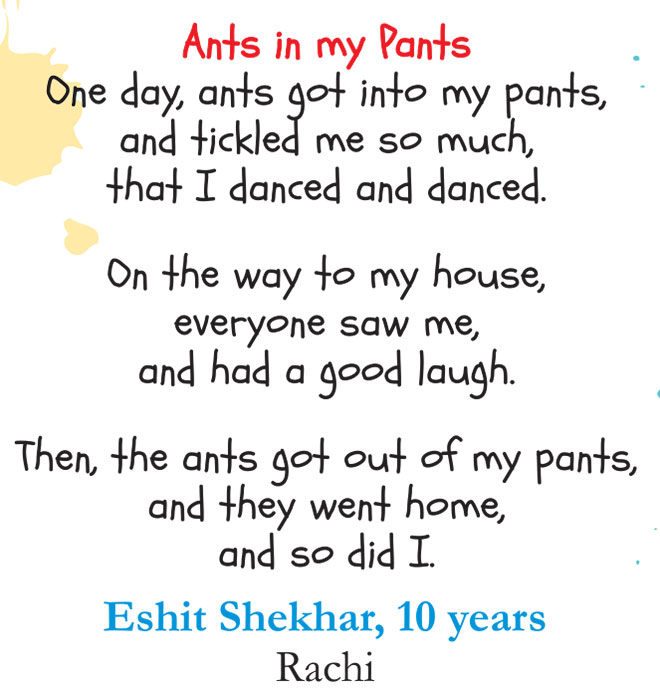
Aunts in my Pants
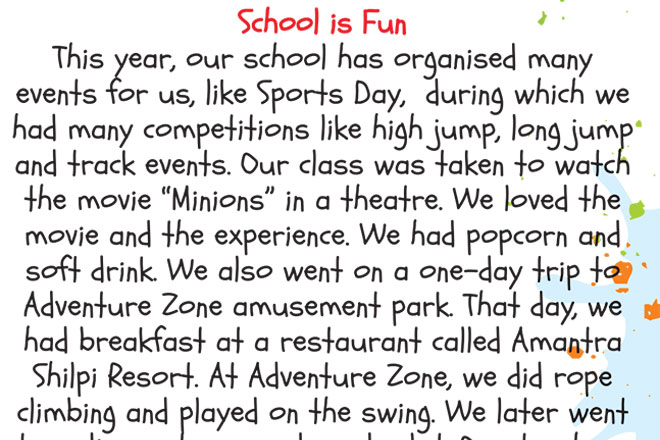
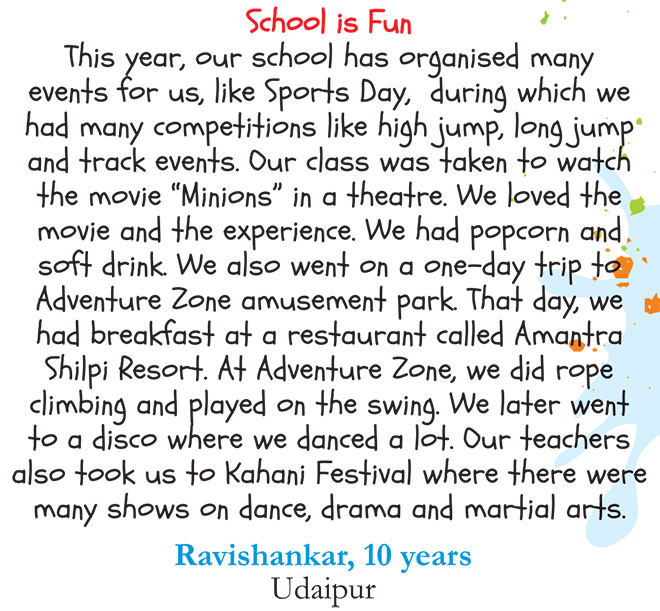
School is Fun

Khushi Vyas
Vaibhav
Puneet Kumar
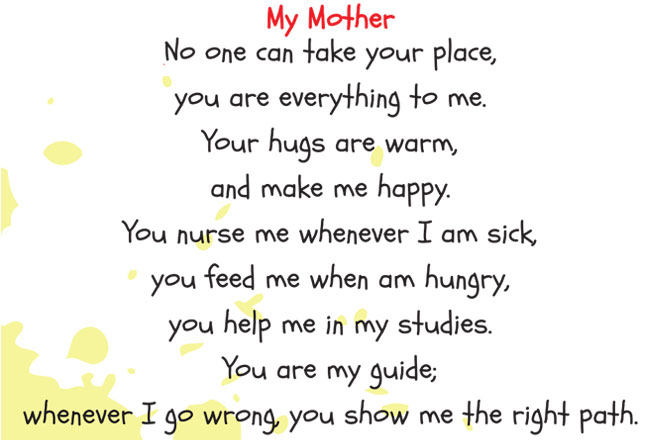
My Mother
No one can take your place,
You are everything to me .
Your hugs are warm,
And make me happy.
You nurse me whenever I am sick,
You feed me when am hungry,
You help me in my studies.
You are my guide;
Whenever I go wrong, you show me the right path.
I will love you forever.
Imanatdeep Kaur Gill, 10 years Mohali
Muskaan Sonka

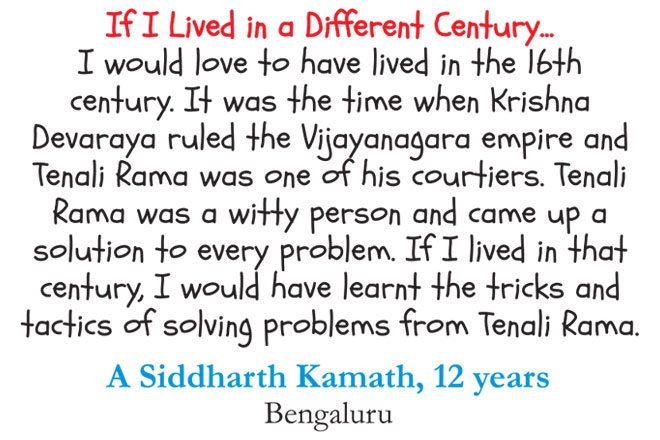
If I Lived in a Different Century…
I would love to have lived in the 16th
Century. It was the time when Krishna
Devaraya ruled the Vijayanagara empire and
Tenali Rama was one of his courtiers. Tenali
Rama was a witty person and came up a
solution t0 every problem. If I lived in that
century, I would have learnt the tricks and
tactics of solving problems from Tenali Rama.
A Siddharth Kamath, 12 years, Bengaluru
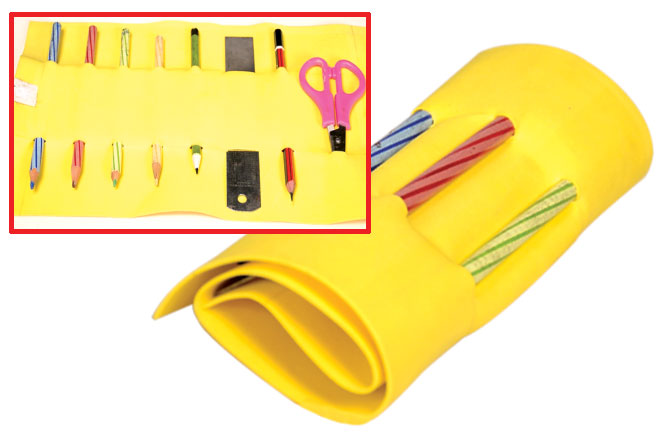
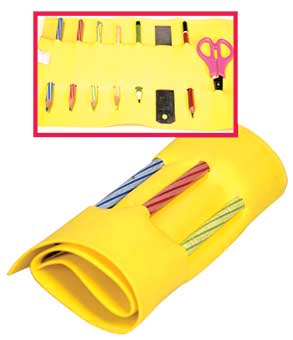
Foam Pouch
You will need:
Foam sheet, scale, cutter, pencil and glue
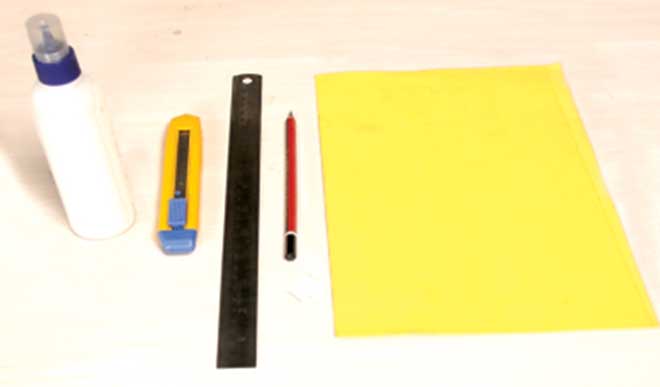
How to make it:
Tip: You can use thread instead of velcro to fasten the pouch.
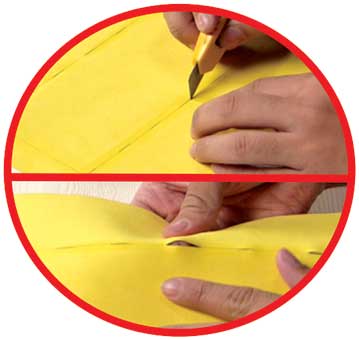
1. On a rectangular sheet of foam, draw two horizontal lines across the length of the sheet-one 6 cms from the top and the other from the bottom.
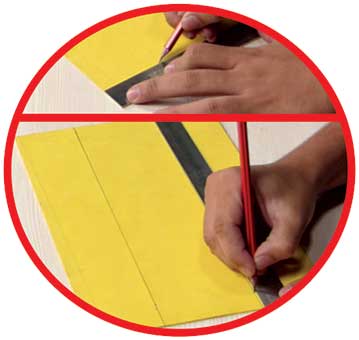
2. Starting from the right, draw small lines measuring 1 cm for the slits over the two horizontal lines. The slits should have a gap of 2 cms between them.
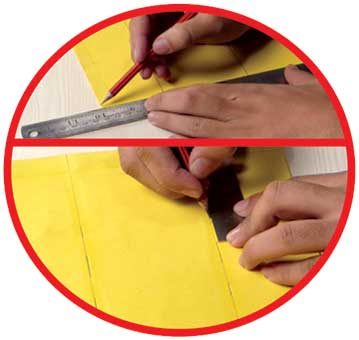
3. You can also draw longer lines measuring 2 cms to make place for bigger stationery like a scale. Using a cutter, cut along these intermittent lines.
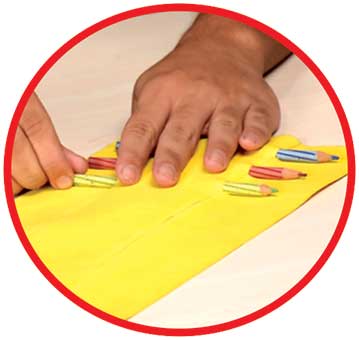
4. Insert pencils or pens through the smaller slits and scale and scissors through the bigger ones.
5. On one end, stick one small square piece of velcro, with the rough side facing up. Roll the pouch from the other end until it meets the velcro. At this point, stick a square piece of soft velcro so that the pouch can be fastenedproperly.
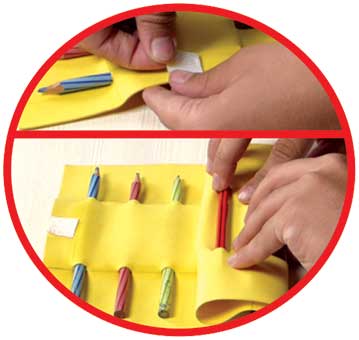
Your foam pouch is ready!

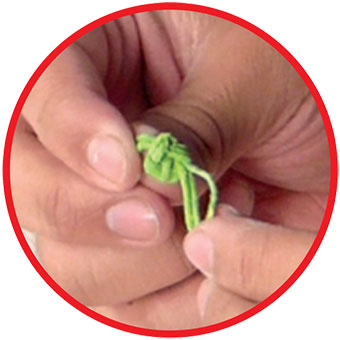
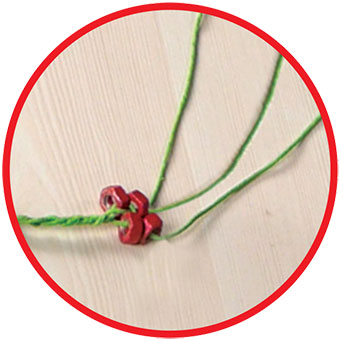
Hex Nut Bracelet
You will need:
String, hex nuts, acrylic paint, brush, tape and scissors.
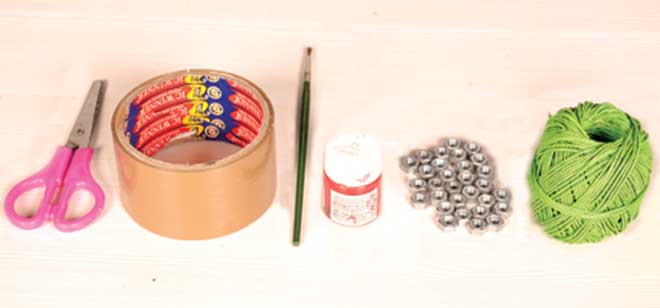
How to make:
Tip: You can also make a hex nut necklace.
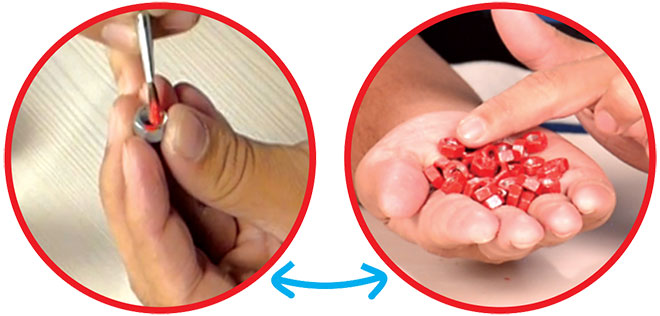
1. Paint all the hex nuts using acrylic paint. You will need about 30 hex nuts depending on the length of the bracelet.
2. Take three pieces of string that are about 30 cms long each.
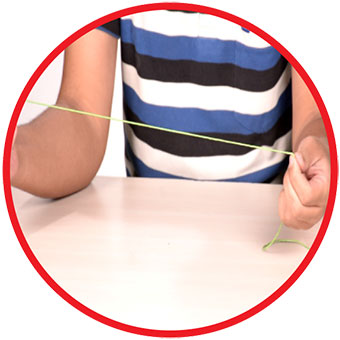
3. When you measure your wrist with the string, make sure to leave an extra 10 cms in the beginning and the end of the string.
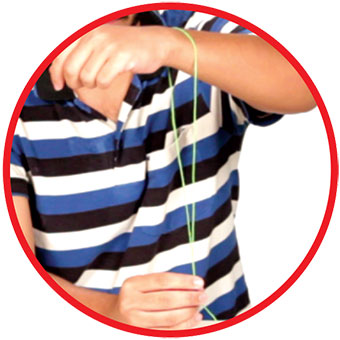
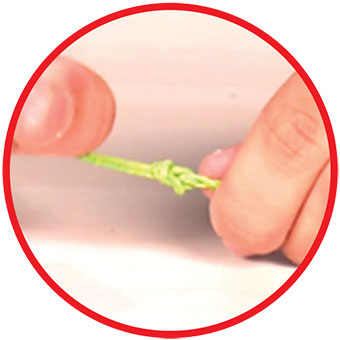
4. Hold the three strings together, leave a gap of about 7 cms and tie a thick knot.
5. Tape the knotted end to the table.
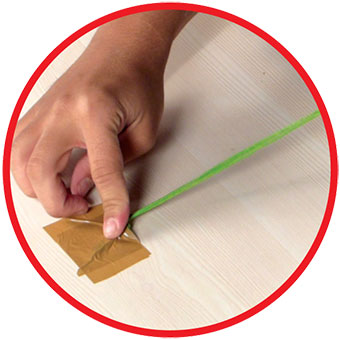
6. Plait the strings for a length of about 3 cms.
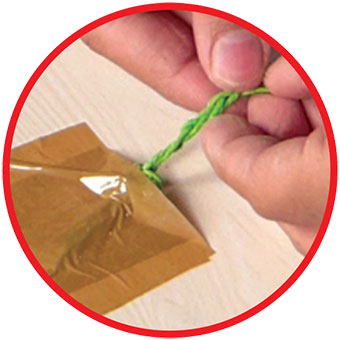
7. Thread the hex nuts onto the strings on the sides dividing them equally. Leave the centre string as it is.
8. After threading all the hex nuts, plait the strings again for a length of about 3 cms.
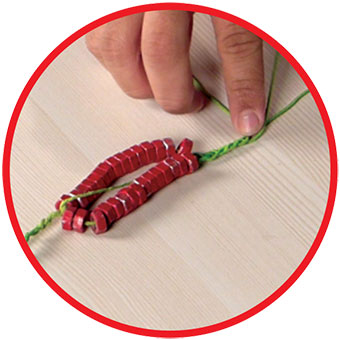
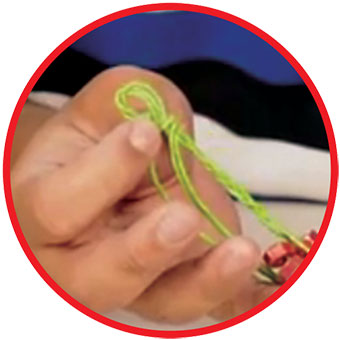
9. Tie the loose ends into a thick knot.
10. Tie the final knot loosely so that it forms a loop as shown.
11. Cut the extra strings.
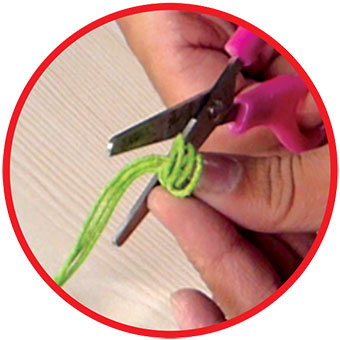
Note: To link the bracelet, insert the thick knotted end through the loop.
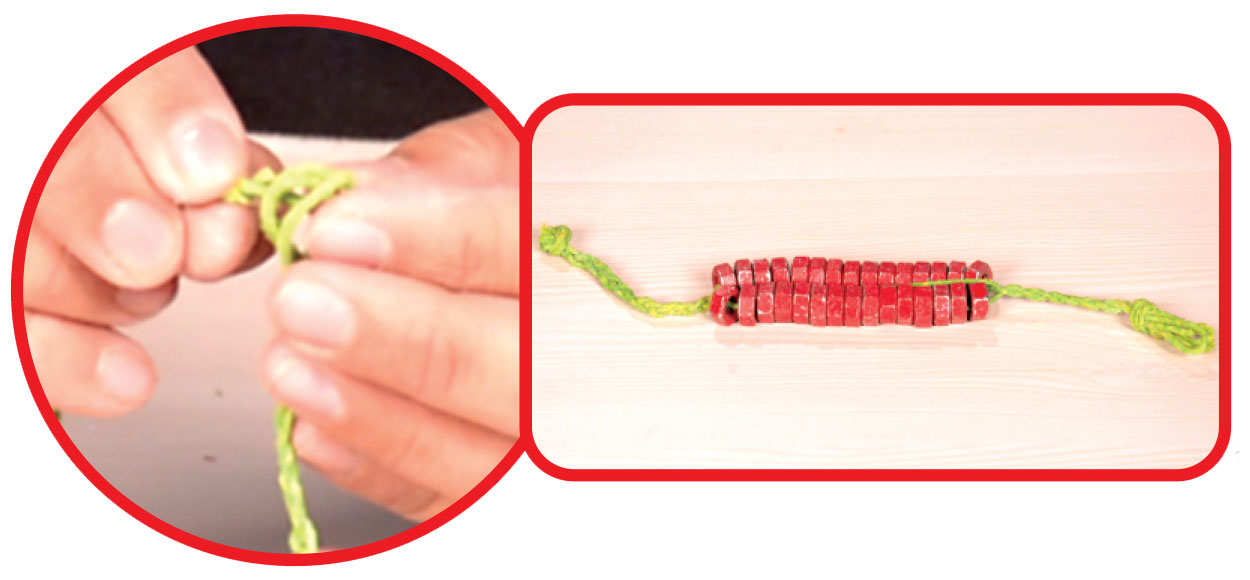
Your hex nut bracelet is ready!

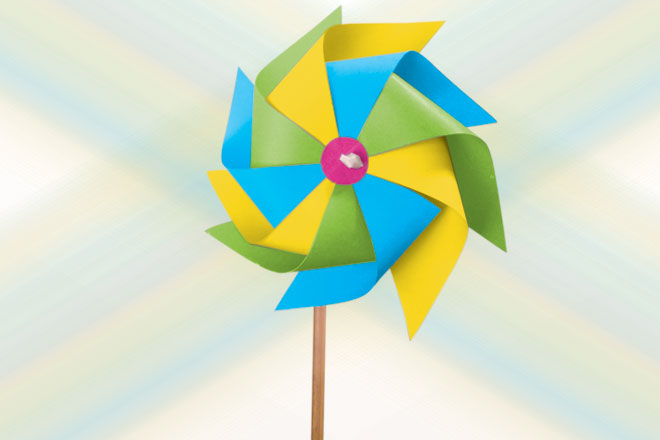
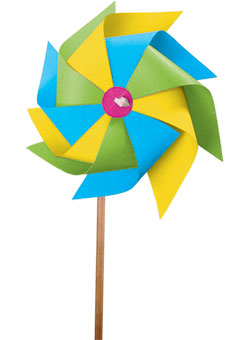
Colourful Pinwheel
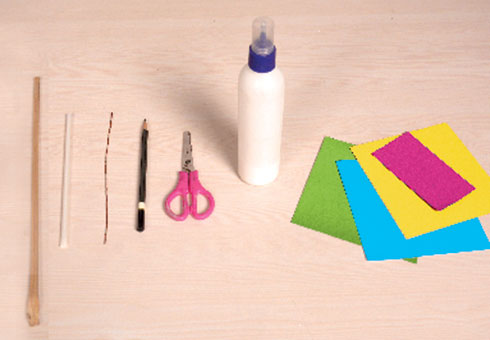
You will need:
Colour papers, stick, straw, metal wire, glue, pencil and scissors.
How to make it:
Tip: You can use marble paper instead of regular colour paper.
1. Cut three colour papers into square sheets of 15×15 cms each. Fold each sheet into half-corner to corner-to form a triangle. Fold it in half again. Open the sheet, and cut along the fold lines.

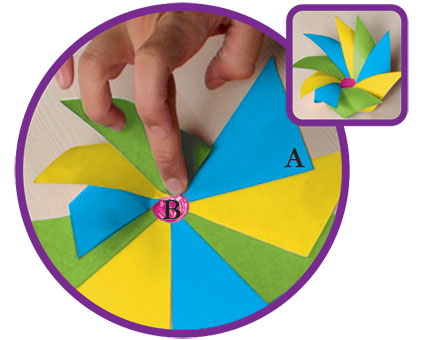
2. You will need three triangles in each colour. Stick the tip of one triangle over the tip of another as shown in the picture. Similarly, stick all the nine triangles to form a circle, alternating between the colours.

3. Cut a small circle from a colour paper and stick it in the centre. Apply glue over ‘A’, fold it, and stick it over ‘B’ as shown. Repeat the step for all the triangles. Cut out another small circle and stick it in the centre again.
4. Bend one end of the metal wire and insert a piece of straw over it. Use the other end to pierce through the centre of the wheel and bring it out the back.
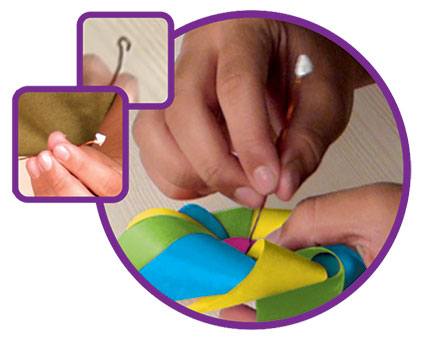
5. Insert a small piece of straw through the back of the wire. Hold the wheel perpendicular to the stick as shown in the inset and wind the rest of the wire around it.
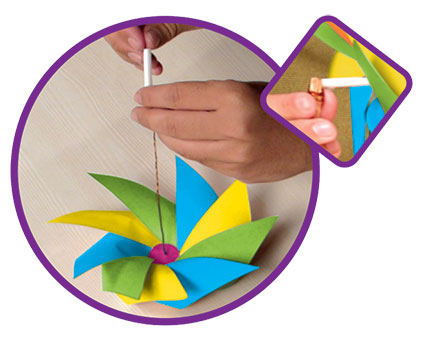
Your colourful pinwheel is ready!
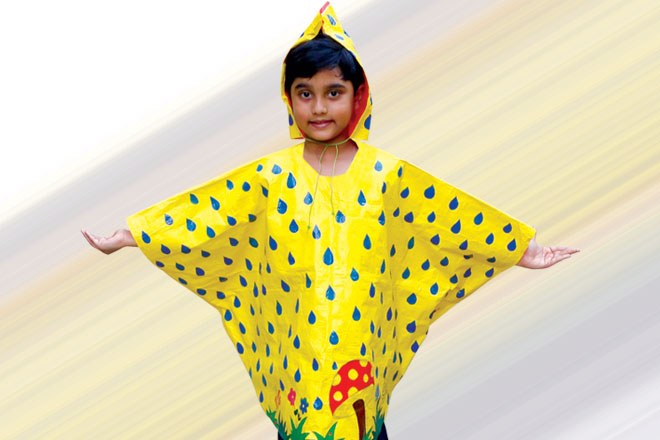
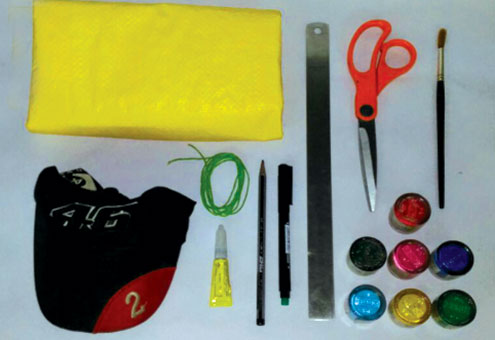
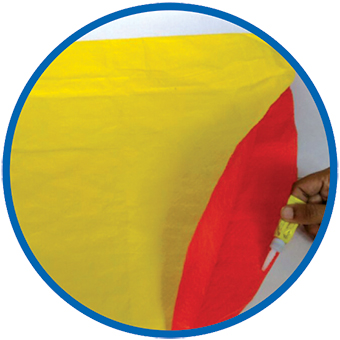
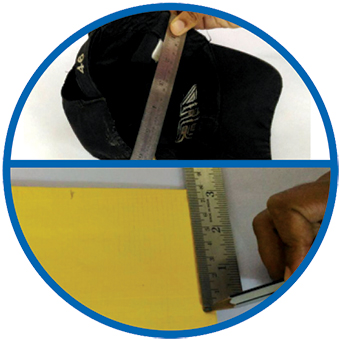
Rain-Proof Poncho
You will need:
Tarpaulin or plastic sheet, cap, thread, hard bond glue, marker, acrylic colours, brush, pencil, scale, scissors
How to make:
Tip: You can also make a poncho using denim or cloth.
1. You will need a sheet that is about 1 metre wide and 1.5 metres long. It can vary depending on how long and wide you want your poncho to be.
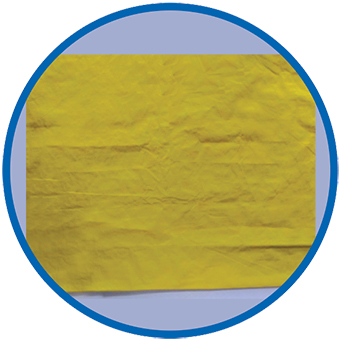
2. Fold the sheet into two and draw a big semicircle. Cut along the line. This will be the body of the poncho.
3. Measure the width of your head using a cap. Use half the measurement as radius and draw a semicircle at the top centre of the sheet. Cut along the line for the neckhole.
4. Stick the two sides of the sheet leaving gaps for your arms and legs.

5. Along the bottom of the sheet, draw a design on both sides.
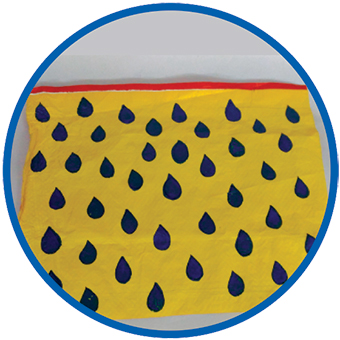
6. Fill the design with colour and put it aside to dry. Use only acrylic paint as it is water-proof.
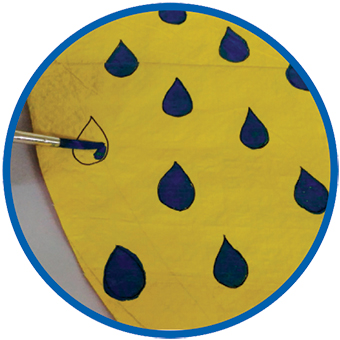
7. Paint the raindrops and keep it aside to dry.
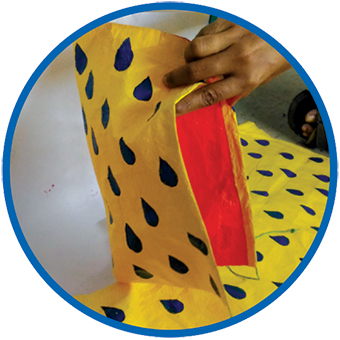
8. Cut out a rectangular piece of the plastic sheet which when folded in half should be large enough to cover your head. This will be the hood of the poncho. Draw raindrops on this sheet and colour them.

9. Apply glue along one length of the sheet and stick the sides together as shown.
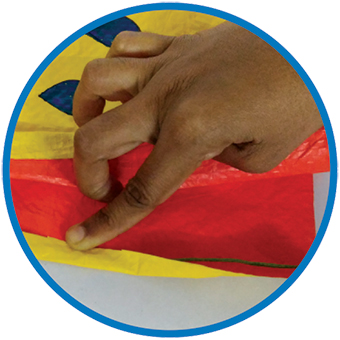
10. Place the thread along the border of the hood. Wrap the edge and stick it over the thread. Make sure that you do not stick the thread itself.
11. Stick the hood to the back of the poncho’s neckhole.

Your rain-proof poncho is ready!

Tricolour Badge
You will need:
Coloured papers, mount board, chain, satin ribbon, black pen, glue, hard bond glue, scissors and pencil.
How to make it:
Tip: You can use a ribbon instead of a chain to make a necklace
1. Cut out a circle from the mountboard.
![]()
2. Cut 1cm wide and 12cm long strips of orange paper. Fold them in half and stick the ends.
![]()
3. Stick the folded strips around the circular cutout.
![]()
4. Make similar but smaller strips from white colour paper and stick them over the orange strips.
![]()
5. Similarly, stick green strips over the white ones. Leave some space in the middle.
![]()
6. Cut out a circle of blue colour paper and stick it in the centre.
![]()
7. Cut two long strips of blue paper and stick behind the badge as
![]()
8. Glue a safety pin behind the badge using hard bond glue.
![]()
You Independence Day badge is ready!
![]()
Rakhi
1. Follow steps 1-6 using different colour papers, and write a message in the centre.
![]()
2. Glue a lengthy piece of ribbon to the back of the badge. The ribbon should be long enough to be tied around your sibling’s writs.
![]()
Yout rakhi is ready!
![]()
Necklace
1. In the rakhi, instead of gluing the ribbon to it make a hole at the top.
![]()
2. Insert the chain through the hole.
![]()
Your Necklace is ready!
![]()

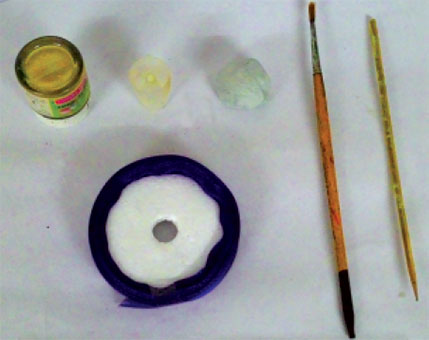
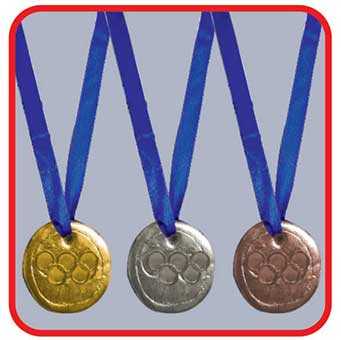
Olympic Medal
You will need:
Air-drying clay, satin ribbon, acrylic paint (gold, silver and bronze), paintbrush, stick or any pointed object.

How to make it:
Tip: You can use cardboard instead of clay and cover it with colour paper.
1. Roll out a small piece of clay to form a basic circular medal shape. Using the stick or a straw, make a hole in the clay, big enough to thread the satin ribbon through it.
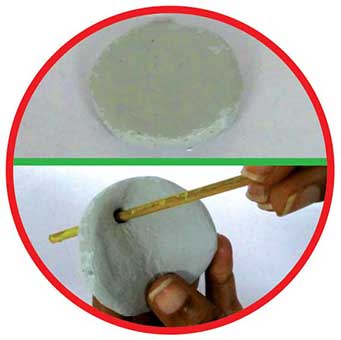
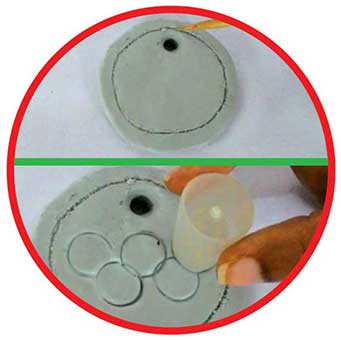
2. Before the clay dries, quickly draw an outline using the stick. Use a pen cap to create the Olympic logo in the centre.
3. After the clay dries completely, paint the medal.
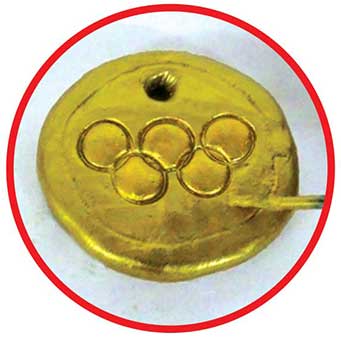
4. Thread the satin ribbon through the medal and knot the ends. The ribbon should be long enough to be worn around your neck.
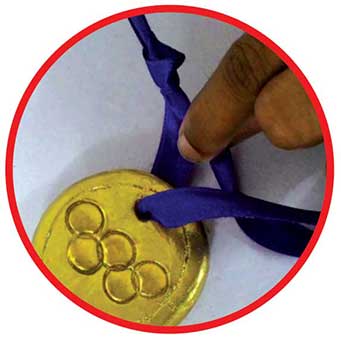
Similarly, using different colour acrylic paints, you can create a gold, silver or bronze medal.

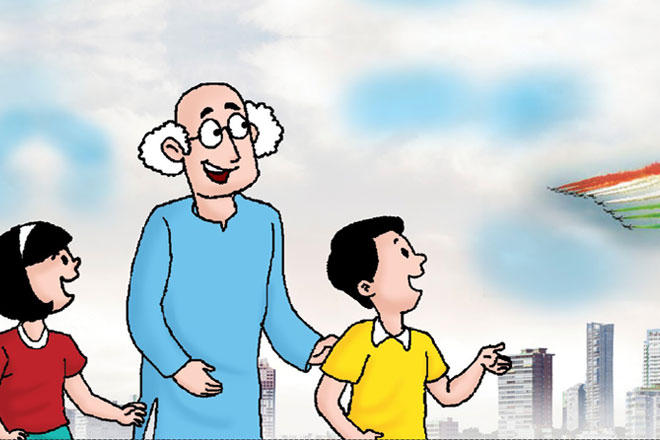
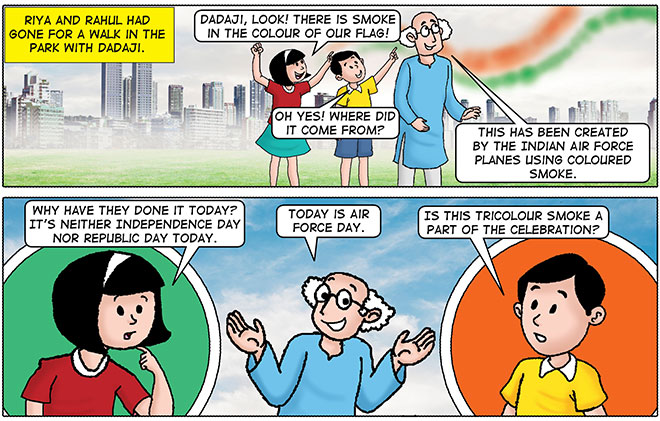
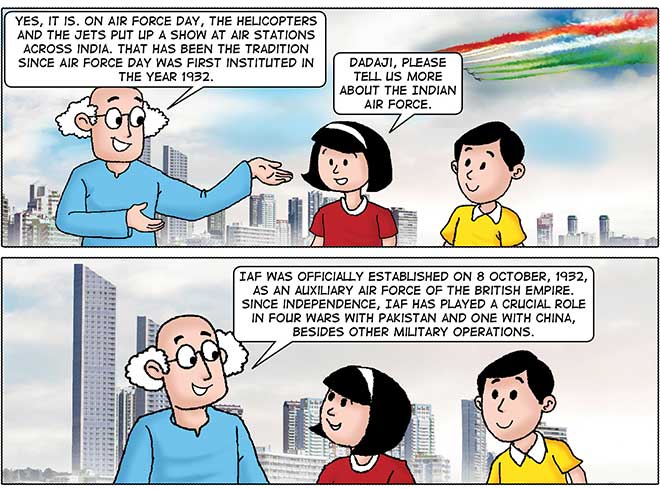
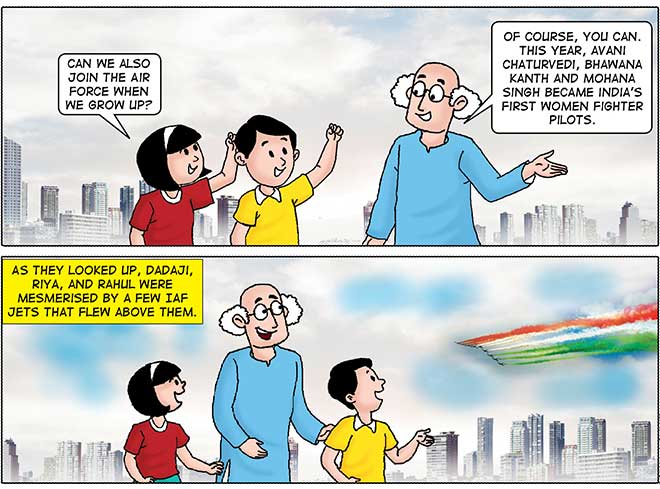
Air Force Day